Converting the Proxxon KT150 table to CNC
Background:
I need a small CNC mill for doing aluminium parts, the KT150 compound table from Proxxon has a 8"X8" bed and 6"X6" travel and is pretty cheap so that is what I am going to use. Combined with this will be an Aerotech ballscrew stage for the z-axis and a Kress 900W router. The Kress is excellent and quiet (for a router) and the z-stage is max overkill but I already had it.
The parts:
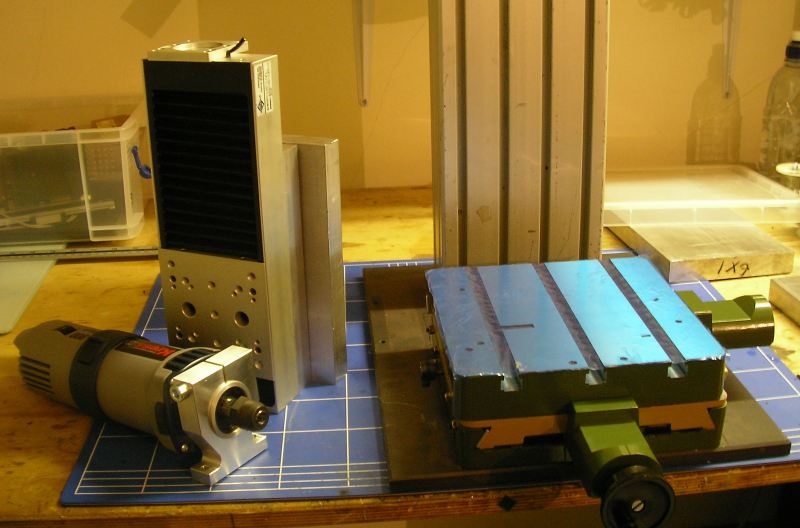
Some ali plate and extrusion will be used for the column. The Bracket for the Kress came from Ebay.
Backlash
Unlike the KT70 table seen on the MF70 mill which had Delrin nuts and v thread screws this table has ACME screws and brass/bronze nuts, these are a loose fit producing lots of backlash. I needed to replace or modify the nuts to reduce the backlash. Delrin was the obvious choice as it is hard wearing, cheap to replace anyway and will shrink back after tapping producing tight backlash free nuts (as on the MF70). The problem is finding a 10X2mm ACME tap. I had seen a few people make there own taps on the CNCzone, they made them from a length of screw. So you either find a supplier of identical rod or use the leadscrew. I've opted to create a short tap on the end of one of the screws. I'll then buy another screw as a replacement part from Proxxon. I'm not sure which way of doing it is cheaper but at least I know the thread form will match perfectly.
Creating the tap
The best thing to do is have a good luck at a real tap before proceeding. The tap has the normal profile of the thread but is tapered so that the full depth of the thread is gained gradually, then three straight flutes are cut, these are deep enough to create an exit for swarf. As with most cutters some rake is added to the cutting edge. Luckily all this can be done using a Dremel or similar rotary tool and a cut off wheel in about 20min.

To create the taper I held the end of the leadscrew in an electric screwdriver, a small clamp was then placed on the trigger and set for a medium speed. A grinding tool was then placed gently against the threads creating a taper, how tapered you go is up to you but Delrin cuts easily so it probably doesn't matter two much. You could do the tapering in a lathe but I thought it would be easier to add it by hand (because taper is not normally linear) and didn't want grinding dust on the lathe ways. A file might be an option.
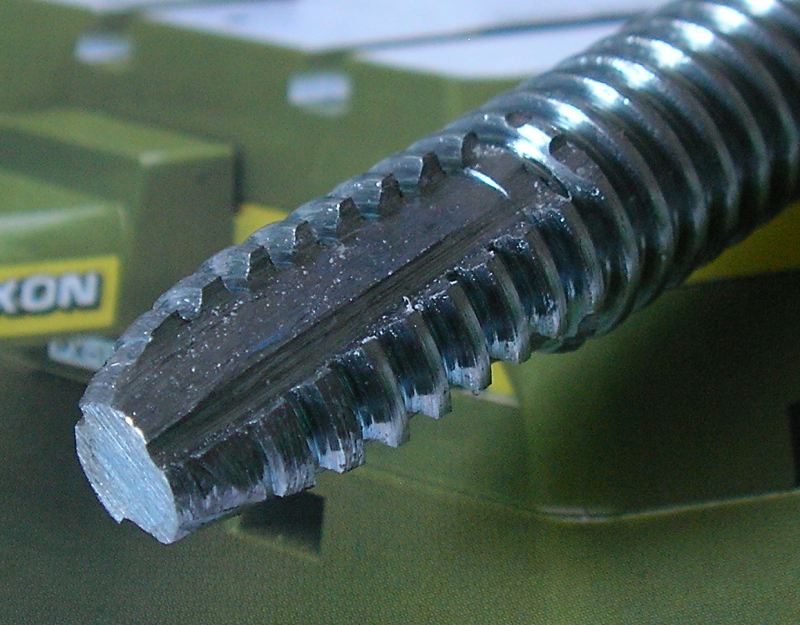
The finished tap, it is fairly short and the flutes are not overly deep but the nuts are not very long and I intended to back off a few times during the cut. You will notice a narrower groove in the flute, this was made using the cut off wheel to create the desired rake on the cutting edge.
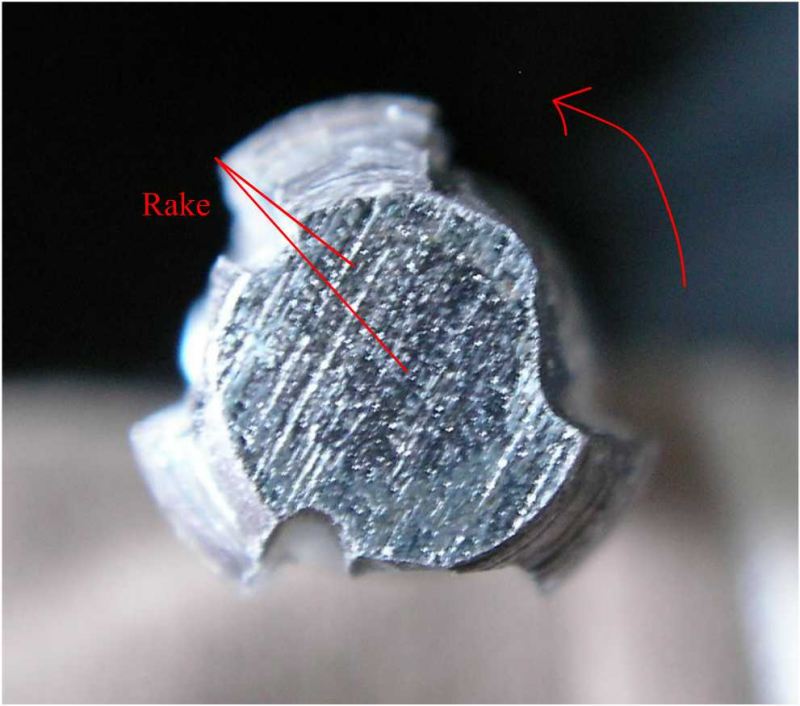
Here is the end of the tap, the easiest way to grind it is to mark three equidistant lines on the threads, then make deep slots with the cut-off wheel defining the cutting faces of the teeth with the desired rake Then once these are done increase the slot width and depth. My teeth are not quite equidistant because I didn't think about this enough at the time!
Running this nut through a 8.5mm hole drilled in Delrin leaves me with a nicely fitting nut, with no backlash noticeable. It seems best to run the tap dry and to back off and clean out on a regular basis. I also found going from both ends multiple times helped loosen it a tad (it was very tight at first).
Problem, when I come to try the first nut on the shorter screw it is tight, obviously the thread form is a little different, so I add a single cutting tooth to the shorter screw, this customizes the nut to the screw, it worked perfectly:
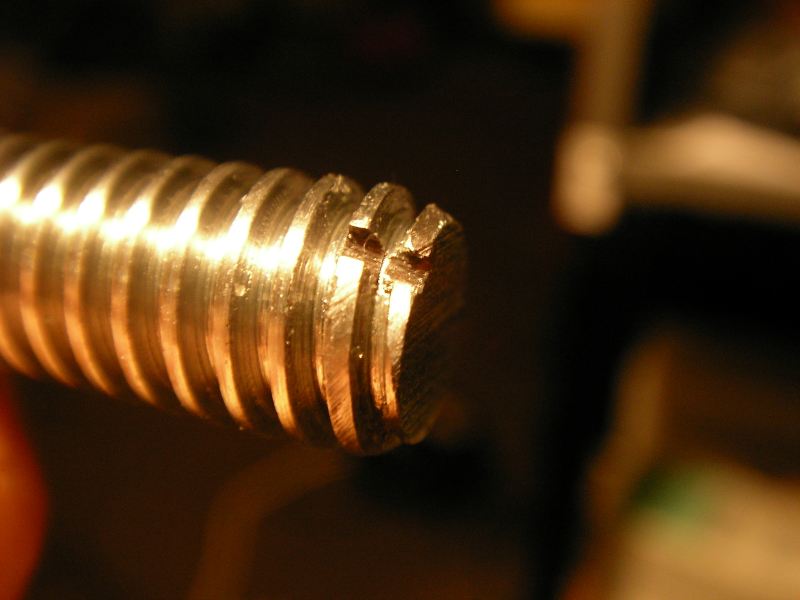
To grind this one I simply made a cut at the point where the thread had acheived its full cross-section, I then ground the thread towards the end of the screw away a bit otherwise it might expand the delrin before the edge had a chance to cut. This "tap" just needed running through a few times to work.
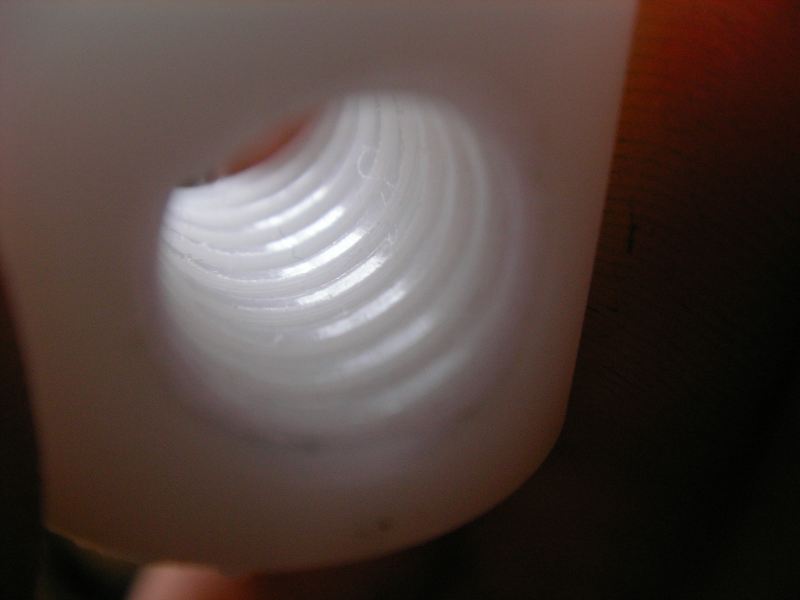
Photographs of white Derin no matter how well machined always look like photographs of *insert city here* at night however I hope you can see some fairly neat threads in that there hole.
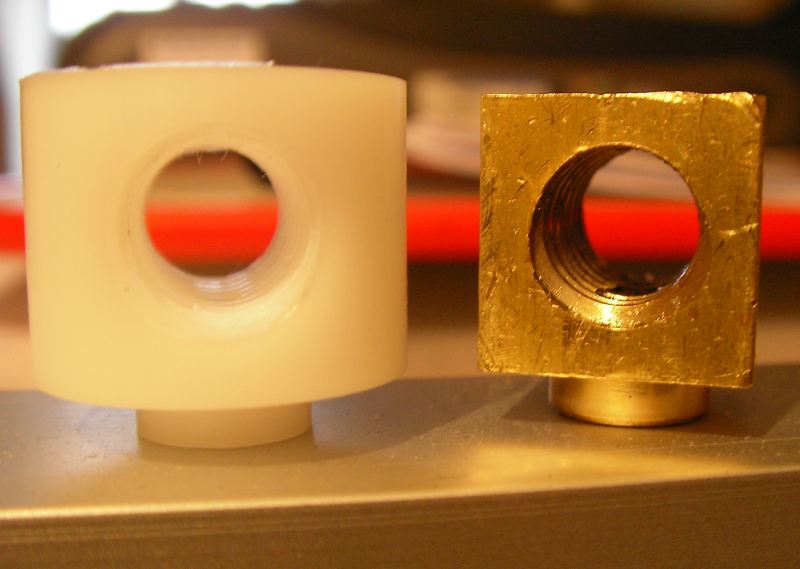
The origional brass nut and the new Delrin one, I made mine from round stock the sides of which now need to be milled to fit through the slot in the casting on the shorter screwed axis.
So I did that on a sanding block, no one said it had to be pretty :)
Leadscrew support
Aside: I'm making parts from Delrin on the MF70 which will later be replaced by aluminium parts on this very machine. The MF70 can machine al but it can't make exactly the parts I want because of the working area, for example the part below will be 50mm OD and circular eventually, the y axis on the Proxxon only goes 43mm!
You need something to restrain the leadscrew axially, otherwise as you turn the screw the bed stays still and the screw moves. This at the very least can add backlash. The screw is 10mm in diameter, typical radial and angular contact bearings are rather large with this ID.

This is my solution well it is mark1. The thrust bearings are axial needle roller bearings. These are very cheap but have great speed and load ratings. They are also very short which is important as there isn't any room in the casting for much and there is not a lot of spare leadscrew to play with. To restrain the screw radially (less important) it runs through a needle roller bearing, this just runs on the screw shaft which should be fine for the small loads it will see. This bearing is a push fit in a delrin assembly I milled on the MF70, this assembly will then be bolted onto the extrusion by three bolts and the stepper motor held on stand-offs from all four of the machined holes. The lower diameter portion of the plate will push into a matching hole that will be machined or at least filed into the casting. This keeps the overhang and leadscrew use to a minimum and means the machining of the casting can be imprecise.
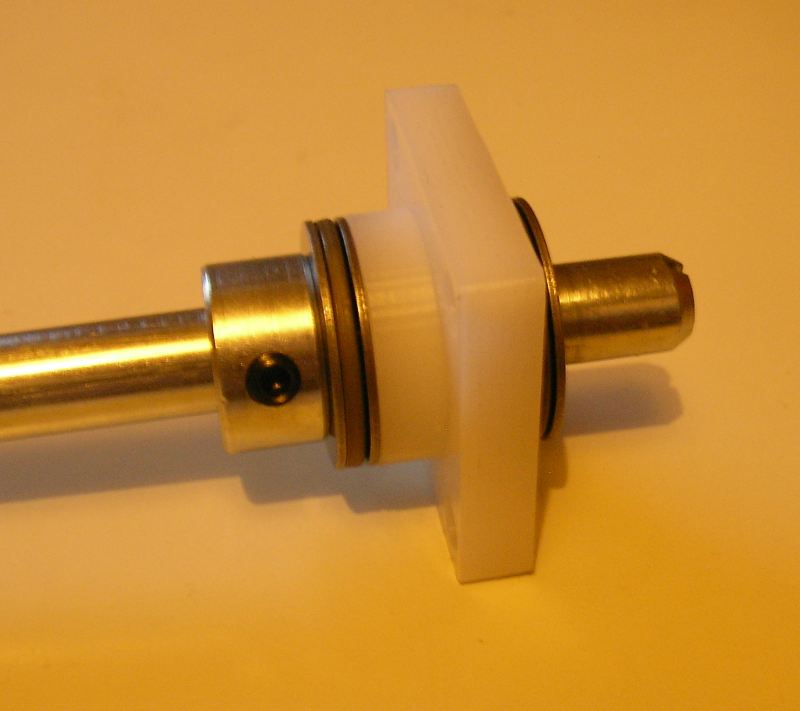
Here it is assembled, the collar may be replaced and held with a rolled pin (we'll see). The shaft now needs threading for a retaining nut and then turning down to match the shaft coupler.